Nourishing Breastmilk Lotion Recipe
Looking for a natural skincare solution? This breastmilk lotion recipe is a soothing way to cherish your little one's skin, filled with love and care!

- A Gentle Touch for Baby's Skin: The Magic of Breastmilk Lotion
- Recipe Overview: A Little History Goes a Long Way
- Key Benefits: Because Your Baby Deserves the Best
- The Transition to Ingredients: Let's Get Mixing!
- Your Go-To Ingredients for Homemade Baby Lotion
- Mastering the Art of Professional Cooking: A Beginner's Guide
- Pro Tips & Secrets to Your Breastmilk Lotion Recipe
- Perfect Presentation Ideas
- Storage & Make-Ahead Tips
- Creative Variations to Explore
- Complete Nutrition Guide for Your Baby’s Skin
- Expert FAQ Solutions
- A Gentle Encouragement for You
- Recipe Card
A Gentle Touch for Baby's Skin: The Magic of Breastmilk Lotion
Oh my gosh, let me tell you about the first time i tried making my own breastmilk lotion ! it was during those early weeks of parenthood when everything felt like a whirlwind.
You know, managing late-night feedings on zero sleep and somehow keeping it together. one day, i stumbled across this soothing lotion recipe while scrolling through instagram.
Intrigued, i thought, why not give it a whirl? after all, breastmilk isn’t just for feeding—it's packed with all these skin-loving properties!
Imagine being able to use something so precious for your baby's delicate skin. breastmilk is like liquid gold, filled with so many breastfeeding benefits .
It's super hydrating and has natural antimicrobial properties that can work wonders for even the most sensitive skin. plus, it’s just one of those unique touches that make homemade baby lotion feel so special.
Recipe Overview: A Little History Goes a Long Way
Breastmilk lotion isn't just a modern fad—its roots go way back. women in different cultures have been using the nourishing properties of breastmilk to treat and soothe their babies' skin for ages.
Today, it's gaining quick popularity as more folks shift toward natural skincare for babies .
Now, this lotion is not some complicated pastry to whip up—trust me! you’ll need about 10 minutes tops, and there’s no cooking involved.
Seriously, it’s easier than brewing a pot of coffee. and you'll end up with roughly one cup of this magical moisturizer, at a cost that'll make you smile.
So, you can stretch that budget while pampering your little nugget!
Key Benefits: Because Your Baby Deserves the Best
Let’s break down the perks. first off, breastmilk skincare is all about health and nourishment . the lotion is chock-full of vitamins and fats that are perfect for moisturizing and protecting your baby’s delicate skin.
If your little one is dealing with baby eczema , this could be a game changer.
What’s more—if you’re picky about what goes on your baby's skin, this diy option delivers. you can customize it with skin-healing ingredients like coconut oil and shea butter, both renowned for their soothing properties.
You're making a gentle moisturizer for baby skin that beats those overpriced commercial lotions any day!
This lotion is perfect for special occasions too! applying it before bedtime can turn into a cozy routine. picture this: soothing music, dim lights, and you coating those tiny arms and legs with this comforting cream.
It’s like a hug for their skin!
The Transition to Ingredients: Let's Get Mixing!
So now that you're on board and super excited about making your own homemade baby lotion , let's dive into what you’ll need.
Trust me; you'll find all the ingredients right in your pantry. with these simple components, you’re on your way to creating a nourishing lotion that's perfect for your little one.
It's not just a lotion; it's one of those diy baby skincare solutions that harnesses the pure power of motherhood.
Ready to get started? Grab your breastmilk, coconut oil, shea butter, and let’s mix up some love for your baby's skin!
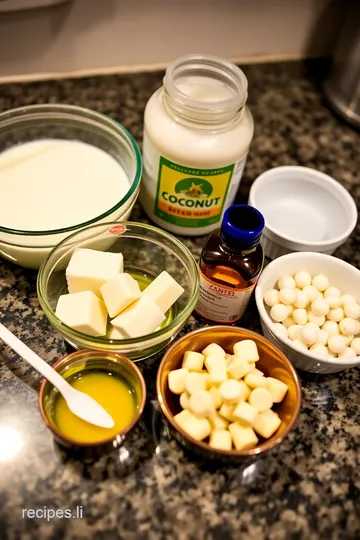
Your Go-To Ingredients for Homemade Baby Lotion
Let’s dive right into the wonderful world of making your own breastmilk lotion recipe ! crafting a gentle moisturizer for baby skin is a perfect way to spend some time while making sure your little one has the best natural skincare.
Trust me—it's not as complicated as it sounds, and you’re going to love the cozy, homemade vibes.
Premium Core Components
When you're whipping up a batch of lotion, it’s essential to start with premium core ingredients . you want to make sure you’ve got the best components to ensure that it’s safe and effective for your baby.
-
Measurements: for our nourishing breastmilk lotion , you’ll need 1/2 cup (120 ml) of breastmilk, 1/4 cup (60 ml) of coconut oil, and 1/4 cup (60 ml) of shea butter.
This means you can easily adapt it to your preference—more on that later!
-
Quality Indicators: Look out for fresh breastmilk—that’s a no-brainer. For oils, always choose unrefined coconut oil and raw shea butter . They pack way more nutrients.
-
Storage Guidelines: Keep your lotion in a cool, dark spot and it’ll last about 1 month . You can store it in jars to keep it nice and tidy.
-
Freshness Tips: Use fresh breastmilk or properly thawed milk—no one wants to be slathering spoiled breastmilk on baby’s soft skin!
Signature Seasoning Blend: The Secret Ingredients
Next up is our signature seasoning blend , or rather, the flavor enhancers for your lotion! While we’re not throwing spices into this one, think of how good it could smell:
-
Essential Spice Combinations: For extra fragrance, consider adding a few drops of lavender essential oil or chamomile . They’re soothing and oh-so-perfect for bedtime!
-
Herb Selections and Pairings: If you want to go the extra mile, infuse the coconut oil with calendula before mixing it in. It’s a natural remedy known for its skin-healing properties.
Smart Substitutions
One size definitely doesn’t fit all in the realm of homemade baby lotion . Here’s where we get to be a little creative:
-
Common Alternatives: Don’t have shea butter? Try mango butter instead for a similar soft texture.
-
Emergency Replacements: In a pinch, you can swap coconut oil for olive oil —it’ll still hydrate but will be a bit lighter.
Kitchen Equipment Essentials
Having the right tools can make this process super easy and enjoyable.
-
Must-Have Tools: You’ll need a double boiler or a microwave-safe bowl, a whisk (or a hand mixer if you’re fancy!), and clean containers to store your new lotion.
-
Storage Solutions: Glass jars are perfect. They keep contaminants away and look nice on your shelf!
Wrapping It Up
There you have it! we’re all set to dive into this soothing lotion recipe that’ll leave your baby’s skin feeling soft and safe.
You’ll be churning out a moisturizing cream with breastmilk before you know it!
So, what can you expect next? i'll walk you through the actual how-to steps of creating this fantastic lotion in the following sections.
Hang tight , and let’s get your diy creativity flowing with some practical instructions!
Mastering the Art of Professional Cooking: A Beginner's Guide
Honestly, if you’ve ever found yourself all frazzled in the kitchen, you’re not alone. professional cooking may sound like a fancy schmooze, but it’s really about being organized, having fun, and whipping up some deliciousness without the drama.
Whether you’re making a gourmet dinner or the perfect batch of breastmilk lotion , the basics apply. so let’s dive into the essentials, shall we?
Essential Preparation Steps
First off, let’s talk mise en place . fancy french words aside, it just means everything in its place. before you even think about turning on the stove, gather all your ingredients and tools.
Imagine trying to cook spaghetti while hunting for that elusive can of tomatoes. nope, that’s a recipe for chaos.
Time management is magic, folks! stick to a timeline by prepping what takes the longest first. if you’re cooking up a roast and need a side salad, chop those veggies while that meat is in the oven.
Timing is everything —try to keep things flowing smoothly.
Now, let’s get organized. use bowls for prepped ingredients or label containers. it makes everything look nice and helps keep your head clear.
Plus, trust me, there’s something satisfying about seeing everything laid out like you know what you’re doing.
And safety? Please, let’s keep our fingers intact. Use cutting boards, don’t run around with sharp knives, and keep those hot pads handy. It’s all about the common sense , you know?
Step-by-Step Process
Okay, here comes the nitty-gritty—your clear, numbered instructions. Think of it like a game plan:
- Gather everything. Seriously, don’t skip this step.
- Preheat the oven. Depend on what you're baking, usually around 350° F .
- Start cooking the item that takes the most time first—like that roast we mentioned.
- Monitor temperature with a food thermometer. For poultry, it should hit 165° F .
- When baking, set a timer and check half-way through. That's your visual cue —golden-brown edges mean you're getting close!
Timing is key. Don’t forget to taste! Often, you’ll need to adjust flavors along the way.
Expert Techniques
Now let’s get real. Want to cook like a pro? Here are some expert techniques :
- Sear meats first for gorgeous color and flavor.
- Braising is your friend when cooking tougher cuts of meat. Those flavors meld together beautifully.
- Always check for doneness. For fish, the flesh should flake easily with a fork, while steaks should have that perfect reddish-pink inside—around 130° F for medium-rare.
Got a hiccup? if things go sideways, don’t panic! for too salty dishes, a splash of vinegar can work wonders.
If your sauce breaks, add a bit of cold water and whisk like crazy.
Success Strategies
Every wanna-be chef makes mistakes, but learning from them is where the magic happens. Keep an eye on the quantity —too much of anything can ruin your dish.
For quality assurance, always taste as you go. Lastly, if you’re making something complicated, plan ahead. Freezing and meal prepping means you’ve got delicious, homemade food ready to go.
Now, remember that lovely breastmilk lotion recipe i mentioned? right, let's shift gears a bit here. it’s like cooking but for skincare! it bombards your baby’s skin with tons of nourishing, skin-healing ingredients.
Wrap-Up
Before you leave the combo kitchen-skincare adventure, let’s keep it real. get comfy in your kitchen. it’s okay to make mistakes.
The biggest thing? embrace the process! whether you're simmering a savory sauce or crafting a gentle moisturizing cream with breastmilk , every experience adds to your cooking credibility.
Stick around for more, ‘cause we’ll dive into some additional information next—think tools, techniques, and tons of resources to up your cooking game and help you whip up nourishing gems like that homemade baby lotion that's perfect for your little one’s skin.
Can't wait to share!
Pro Tips & Secrets to Your Breastmilk Lotion Recipe
Alright, let’s dive into some pro tips that'll elevate your homemade breastmilk lotion recipe from good to great. first off, if you’ve got a minute, let’s chat about ingredient quality! the fresher your breastmilk, the better.
You know, just like grandma’s homemade cookies are always the freshest—use that good stuff! keep it in the fridge and make it as soon as you can after pumping.
Time-saving techniques? you bet! use a double boiler instead of melting ingredients in the microwave. trust me; it saves you from the microwave-melting game, which can turn out to be a hot mess.
Plus, it keeps the heat gentle and your oils intact.
Now, when it comes to flavor enhancement (yeah, i said flavor, but you know what i mean!), don’t shy away from adding a few drops of skin-safe essential oils .
Lavender is a cozy pick for bedtime, and chamomile is like a warm hug for sensitivity. just remember, too much can make it itchy, so keep it light!
For presentation , let’s face it, nothing says “i care” like a lotion that looks as good as it feels.
Splash a little color by choosing colorful containers—those cute glass jars you find at the thrift store? yeah, snag those! a little ribbon wouldn’t hurt either.
Something that says, “i made this just for you.”
Perfect Presentation Ideas
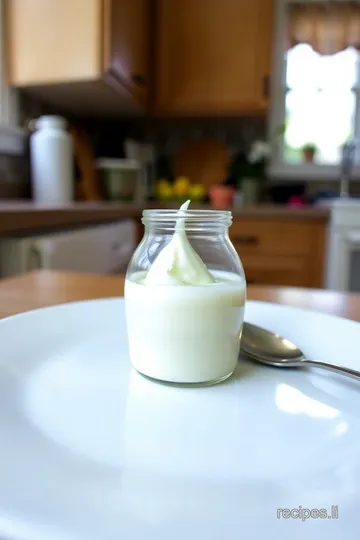
Speaking of jars, once your breastmilk lotion is whipped up, it's all about how you present it. plating for skincare doesn’t have to be complicated.
Think simple! pour your lotion into jars and top with a sprig of dried lavender or chamomile flowers. it gives that rustic vibe, lookin’ adorable on your bathroom shelf!
You know those instagrammable shots? use a light-colored backdrop when you snap a pic of your lotion. natural light is your best friend here.
It’ll make your jars pop and draw attention to that creamy goodness inside.
Storage & Make-Ahead Tips
Now, moving on to storage. you’ve whipped up this wonderful diy lotion. but how long can you keep it? here’s the scoop: store your lotion in a cool, dark place .
If you kept it in the fridge, it could last about two weeks ; at room temp, maybe one week max.
If you want longevity, consider adding natural preservatives like a few drops of rosehip oil .
For those busy mamas out there, make-ahead is where it’s at! double or triple your batch, and divide it into smaller containers.
This way, you’re set for a whole month of nourishing skin therapy.
Creative Variations to Explore
Feeling adventurous? let’s talk creative variations ! for seasonal twists, how about a pumpkin spice version come autumn? just a smidge of pumpkin extract mixed in – it smells divine! plus, if you have baby eczema concerns, you can infuse the lotion with calendula flowers for extra soothing.
If you're aiming for a vegan option, simply swap beeswax with candelilla wax . It’ll thicken the lotion without compromising your values at all!
Complete Nutrition Guide for Your Baby’s Skin
Let’s focus a bit on the nutrition side of this all-natural lotion. we’re talking about serious skin-healing ingredients here! coconut oil is your bestie for moisturizing, while shea butter offers that ultra-hydrating punch.
Together, they're like an amazing team in a buddy cop movie!
Each tablespoon gives you about 40 calories —but it’s more about softening and bringing the glow to your baby’s delicate skin, right? this lotion is perfect for gentle moisturizing, especially for those first few months when baby’s skin is adjusting to the world.
Expert FAQ Solutions
Got questions? i’ve got answers! one i hear often: “what if my lotion is too runny?” no sweat! just add a little more beeswax.
If it’s too thick? warm it slightly and blend in a bit more coconut oil.
Here’s the secret—always patch test a little on baby’s skin first before slathering it on post-bath. You want happy skin, not a cranky diaper change!
A Gentle Encouragement for You
Alright, friends, you now have the insider scoop on creating your very own breastmilk lotion ! look into in, get messy, and don’t stress if it doesn’t turn out perfect on the first go! we’re all learning here.
Natural skincare for babies doesn’t have to be overwhelming.
Remember, nourishing your baby’s skin with natural products is a beautiful thing, sharing the breastfeeding benefits that come along with it.
So, embrace those early days, because they won’t last forever. happy mixing!
Nourishing Breastmilk Lotion Recipe Card
⚖️ Ingredients:
- 1/2 cup (120 mL) breastmilk (fresh or thawed)
- 1/4 cup (60 mL) coconut oil (unrefined)
- 1/4 cup (60 mL) shea butter
- 1 teaspoon (5 mL) vitamin E oil (optional)
- 1 tablespoon (15 mL) beeswax pellets (optional)
- Essential oils (e.g., lavender or chamomile, optional)
🥄 Instructions:
- Step 1: In a double boiler or microwave-safe bowl, combine coconut oil and shea butter. Heat gently until melted, stirring occasionally.
- Step 2: If using beeswax, add it to the melted mixture and continue stirring until fully melted.
- Step 3: Remove from heat and let cool slightly. Gradually whisk in the breastmilk until fully incorporated.
- Step 4: Stir in vitamin E oil and any essential oils if desired.
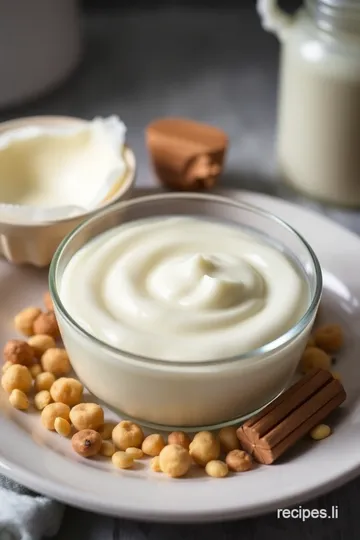
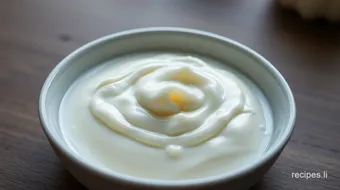
- Step 5: Use a hand mixer or whisk to blend until the mixture is light and fluffy.
- Step 6: Transfer the lotion into clean containers and allow to cool completely before sealing.
Previous Recipe: My Grandmother's Mexican Cornbread Recipe with Jiffy: 5 Delicious Twists
Next Recipe: Easy Webkinz Recipes: 5 Delicious Fruit Salads for Summer Fun