Easy Veggie Tray Fun & Colorful Delight
Looking for a fun and vibrant appetizer? Try my Easy Veggie Tray Fun & Colorful Delight! It’s fresh, simple, and perfect for any gathering. Enjoy!

- Essential Ingredients Guide for Your Easy Veggie Tray Fun & Colorful Delight
- Mastering Professional Cooking: The Secret to Success in Your Kitchen
- Pro Tips & Secrets: Creating Your Easy Veggie Tray Fun & Colorful Delight
- Perfect Presentation: How to Wow Your Guests
- Getting Ready for Storage & Make-Ahead Magic
- Creative Variations: Spice It Up
- Complete Nutrition Guide: Know Your Fuel
- Expert FAQ Solutions: Troubleshooting and More
- Recipe Card
Oh my gosh, have you ever found yourself scrambling for something light , fresh , and downright fun to serve at a party? it happens to the best of us! a few summers ago, i was hosting a picnic, and i wanted something more than just chips and salsa.
That’s when i whipped up the easy veggie tray fun & colorful delight , and let me tell ya, it was a hit! i set it down, and people were all over it like kids at a candy store.
This veggie tray isn’t just about snacking; it’s a playful, colorful experience that even your picky friends will appreciate. seriously! there's something about a colorful veggie platter that brings a smile to your face.
It’s perfect for any occasion—from family game nights to summer picnics. plus, it’s super easy to prep, making it a go-to for those of us who prefer to spend time enjoying the party rather than kitchen duty.
Recipe Overview
Okay, let’s talk history! veggie trays have been around since the early days of entertaining. back when folks didn’t have as many quick and easy recipes at their fingertips, fresh veggies became a go-to for appetizers.
Nowadays, they’ve gained a modern twist, and that’s made them a whole lot more popular, too. with more focus on healthy eating habits , the veggie tray is here to stay.
So, how long does it take to whip up this beauty? you’re looking at about 15 minutes of prep. yep, you read that right! zero cooking involved—just chop, arrange, and serve.
And if you’re concerned about funds, this tray is relatively low-cost. you can feed around 6 to 8 people without breaking the bank! talk about a double win for your wallet and your guests.
Key Benefits
Now, let’s get into why this veggie tray rocks! first off, it’s packed with health benefits . think about it: crunchy vegetables like broccoli florets and baby carrots are not just colorful but also loaded with vitamins and minerals.
They offer a fantastic source of fiber, which is a big plus when it comes to making healthy snacks.
One of the unique selling points of this tray? it’s super versatile! you can throw it together for just about any occasion.
Whether it’s a laid-back family get-together or festive celebrations, it’s bound to impress. plus, with a variety of best dips for veggies , you can mix it up so there's always something new to try.
And hey, this isn’t just for adults! kids can get in on a vegetable platter for kids too, making it a family-friendly snack that everyone can enjoy together.
Just think of all those vibrant flavors laid out in front of you—perfect for teaching the little ones that healthy snacks can be fun ! plus, if you’re looking for easy party appetizers , this checks all the boxes.
No fussy recipes, just good old fresh produce at its finest.
Conclusion
So, are you ready to dive into this easy and colorful creation? next up, we’ll explore the star-studded lineup of ingredients that make this recipe shine.
Not only will you have that visual appeal in food nailed, but you’ll also be left with a tasty and vibrant fresh vegetable assortment that everyone will enjoy.
Let’s get chopping!
Essential Ingredients Guide for Your Easy Veggie Tray Fun & Colorful Delight
Building a stellar colorful veggie platter is all about using the right ingredients. it’s not just about crunch; it’s about flavor, freshness, and, of course, those gorgeous colors that make your veggie spread pop.
Let’s break it down, shall we?
Premium Core Components
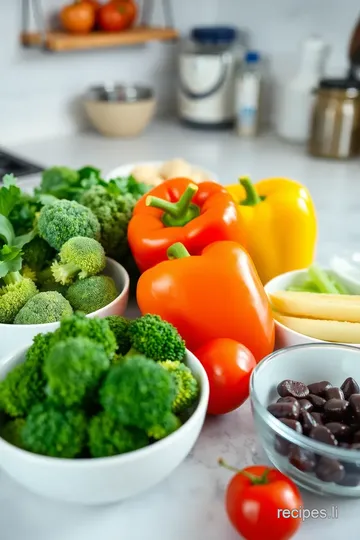
Alright, first things first – you gotta know how to pick your produce. When you’re grabbing those fresh veggies, look for vibrancy and uniformity . Here are some handy tips:
-
Measurements Matter :
- 1 cup (150g) of cherry tomatoes, halved. They're sweet and juicy!
- 1 cup (130g) cucumber, sliced. Refreshing, right?
- 1 cup (180g) bell peppers in mixed colors. Use all the hues!
-
Quality Indicators :
- Use veggies that are firm to the touch. Soft or wrinkled means they're on their way out – nobody wants sad veggies on their DIY Veggie Tray !
-
Storage Guidelines :
- Store your veggies in the fridge but keep them unwashed until you’re ready to slice ‘em up. They’ll stay fresher longer.
-
Freshness Tips :
- Check for blemishes! Right before you use them, give those ones a little squeeze. If they’re springy, they’re good to go.
Signature Seasoning Blend
You can dress up your Veggie Tray Presentation with some delicious dips and seasonings that are a breeze to make.
-
Essential Spice Combinations :
- Think about a dash of garlic powder or, if you’re feeling adventurous, a hint of smoked paprika.
-
Herb Selections :
- Fresh dill is your best friend here! It pairs beautifully with yogurt dips.
-
Flavor Enhancers :
- A squeeze of lemon can brighten up your veggies, making them taste even more vibrant.
Smart Substitutions
Sometimes, you just gotta roll with what you’ve got on hand.
-
Common Alternatives :
- Don’t have Greek yogurt? Sour cream or even a dairy-free yogurt can work wonders.
-
Dietary Modifications :
- To make this a low-calorie appetizer , swap out the full-fat yogurt for a lighter, lower-cal option.
-
Emergency Replacements :
- Out of cucumbers? Grab some radishes for that extra crunch and zing.
Kitchen Equipment Essentials
Now, let’s not forget about the tools that’ll make your life so much easier.
-
Must-Have Tools :
- A sharp knife and a big cutting board are key. You’ll want to get those veggies sliced quickly and cleanly.
-
Preparation Tips :
- Pre-cut your veggies a day ahead if you're super busy! Just pop them in a container with a damp paper towel for that crunch.
-
Storage Solutions :
- Keep your cut veggies in the fridge in an airtight container. They’ll be fresh and ready for snacking.
Now that we’ve covered the essentials, you’re prepped and primed for the fun part: creating that easy veggie tray fun & colorful delight ! with your freshness tips and smart ingredient choices, you're set to impress your friends and family.
So grab those vibrant veggies, whip up a tasty dip, and let’s dive into the deliciousness!
Next up, we’ll roll right into the easy-to-follow steps to craft your stunning veggie tray that not only looks good but is also packed with the nutritional benefits of vegetables .
Trust me, you’re gonna want to make this again and again!
Mastering Professional Cooking: The Secret to Success in Your Kitchen
Let’s chat about something that can elevate your cooking game— professional cooking methods . yeah, it sounds a bit fancy, but it’s really just about setting yourself up for success in the kitchen.
Whether you’re whipping up a colorful veggie platter for family night or going all out for a party, mastering these techniques can be a total game-changer.
So grab your apron, and let’s dive into the essentials!
Essential Preparation Steps
First up, we gotta talk about mise en place . that’s just a snazzy french term for “everything in its place.
” before you even think about turning on the stove, chop up your veggies, measure your ingredients, and have everything at the ready.
Seriously, it’ll save you from scrambling at the last minute.
Now, let’s get into time management tips . always start with the ingredients that take the longest to prep or cook.
Then, work your way to quicker tasks. for instance, while your fresh vegetable assortment is roasting, you could be chopping up that incredible homemade dip! talk about multitasking like a boss.
When it comes to organization strategies , keep your workspace tidy. trust me, it’s hard to focus with a cluttered kitchen! and don’t forget safety considerations.
Always, and i mean always, use a sharp knife. dull knives can slip and lead to accidents, and no one wants a kitchen mishap.
So keep those hands safe!
Step-by-Step Process
Alright, let’s break it down. Here’s a clear, numbered guide for cooking success.
- Start with proper prep. Make sure your veggies are clean.
- Control your temps. For example, if you're roasting broccoli florets, crank the oven up to 425° F . This will give you that delightful char in about 15 to 20 minutes .
- Precision in timing is everything. Use a timer! If you’re letting that veggie tray chill in the fridge, set a timer to remind you when to serve.
- Visual cues for doneness ? Absolutely! Know that your carrots are perfectly cooked when they turn vibrant and tender without losing that crunch.
Expert Techniques
Now, onto the fun part— expert techniques . a little finesse goes a long way, am i right? for example, if you’re using that zesty dip recipe from above, i suggest tasting as you go.
You might realize it needs a tiny bit more lemon juice for that zing!
Always check for quality. before you make your diy veggie tray , ensure your veggies are fresh and crisp. wilted veggies? sorry, but they’re a no-go! pro tip: shop at your local farmer’s market for the best freshness.
And if things go south, you need some troubleshooting tips . if your crunchy veggie sticks aren’t looking so cute, just remember, it’s all about the presentation.
Arrange them into neat rows or a rainbow pattern to distract from the slight flaws!
Success Strategies
Let’s face it—nobody’s perfect, and we all mess up from time to time. Common mistakes to avoid? Overcooking your veggies. Remember, they should be vibrant and fresh, not mushy!
For quality assurance, do a quick taste before serving any dips or sauces. And trust me, perfect results won’t happen if you’re trying new techniques last minute—practicing them beforehand works wonders.
Finally, think of make-ahead options . many dips and even cut veggies can hang out in the fridge, just waiting for that last-minute party invite.
It's all about being prepared and enjoying the process!
As you prep that easy veggie tray fun & colorful delight , keep these tips in mind. bringing together a fresh vegetable assortment and serving it with love can lead to an unforgettable snack experience—perfect for any gathering.
Additional Information
Any cook knows that a little knowledge goes a long way. the world of cooking is vast, so don’t shy away from exploring different methods and ideas.
Check out seasonal veggies when crafting your dishes or take a leap into making flavorful dip recipes to pair with your snacks.
Gather your friends or family, and let’s inspire each other. Your party food recipes and creative snacks wait to be discovered. Happy cooking, y’all!
Pro Tips & Secrets: Creating Your Easy Veggie Tray Fun & Colorful Delight
Hey y'all! let’s dive into the world of veggie trays! you know, the kind that makes you go, “oh my gosh, how good does that look?” here are some of my favorite pro tips to transform your colorful veggie platter into a showstopper.
First off, my secret weapon? time-saving techniques are a game changer. prepping your veggies ahead of time can save you those last-minute panics.
Chop them up the night before. trust me, when you pull that out, all you’ll need to do is arrange, and voila! instant party central!
When it comes to flavor enhancement , try adding a squeeze of lemon juice over your cut veggies right before serving.
It brightens up the flavors and makes those crunchy vegetables sing! and if you're feeling fancy, sprinkle some salt or chili powder on top.
Just a dash can elevate your tray to new heights.
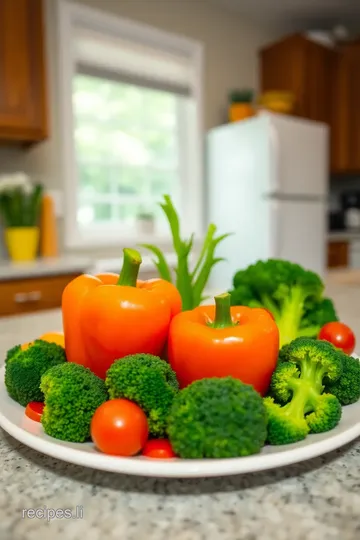
Now, speaking of presentation—layout is key! group your veggies by color or mix it up for a rainbow effect. arrange the fresh vegetable assortment in a spiral or circle for that pinterest-worthy look.
You always eat with your eyes first, right?
Perfect Presentation: How to Wow Your Guests
Let’s talk about plating techniques . using a large, round platter is a no-brainer. it keeps everything accessible and looks pretty.
Don’t forget to have a small bowl of your zesty dip in the center—think ranch, hummus, or my favorite homemade vegetable dip—so that it draws the eye and invites folks to dig in.
When it comes to garnishes, consider sprigs of fresh herbs or edible flowers to jazz up your veggie tray presentation .
They bring a fresh vibe and some surprising color combinations. plus, who doesn’t want to feel fancy while munching on veggies?
Getting Ready for Storage & Make-Ahead Magic
Alright, i get it—sometimes you just can’t prep things last minute. here’s your solution! you can store your veggies in the fridge for up to three days before the big event, just make sure to keep them in an airtight container.
They’ll stay crisp and fresh so that when your guests show up, your tray still looks like a vibrant vegetable combination out of a magazine!
If you’re tossing them in a picnic basket, remember to wrap them in damp paper towels to keep everything feeling fresh.
Reheating? no sweat with veggies: no need! just enjoy them as they are.
Creative Variations: Spice It Up
Now let’s get adventurous! mix in different veggies like zucchini or snap peas to give your tray a little twist.
Got kids meeting you for snack time? make a vegetable platter for kids with fun shapes—use cookie cutters to create bite-sized stars and hearts.
They might actually eat their greens!
Feeling festive? incorporate seasonal vegetables—like roasted squash or brussels sprouts during the holidays. it turns your basic tray into a farm-to-table appetizer .
And for those spice lovers, add some sliced jalapeños to your dip or go wild with flavor by making a spicy yogurt dip!
Complete Nutrition Guide: Know Your Fuel
Wondering about the health benefits? good ol’ veggies are low-calorie appetizers that pack serious nutrients. each serving of your easy veggie tray keeps you on track with healthy eating habits while filling your belly with goodness.
Make sure to show your guests the nutritional benefits of vegetables . let them know they’re enjoying the best.
And when it comes to serving size, aim for about six to eight people with this colorful goodness. the kids will love grabbing their share, and you might find them munching away happily while you sip on some iced tea.
Expert FAQ Solutions: Troubleshooting and More
Lastly, i know you may have questions! here’s a quick faq. if your veggies seem wilty? it’s all about the moisture.
Store those in water and keep them cool. want to add a kick? a squeeze of sriracha or a few drops of hot sauce into your dip can liven things up!
So here’s the wrap-up: creating the easy veggie tray fun & colorful delight is not just about the veggies but has everything to do with how you present and enjoy them.
Don't overthink it. grab what looks fresh, keep it bright and colorful, and enjoy hanging out.
Now go on, have fun with it, and know you’re making a healthy snack idea that everyone will rave about! Happy snacking!
Easy Veggie Tray Fun & Colorful Delight Card

⚖️ Ingredients:
- 1 cup (150 g) cherry tomatoes, halved
- 1 cup (130 g) cucumber, sliced
- 1 cup (180 g) bell peppers (mixed colors), sliced into strips
- 1 cup (120 g) baby carrots
- 1 cup (150 g) broccoli florets
- 1 cup (150 g) cauliflower florets
- 1 cup (240 g) plain Greek yogurt
- 2 tablespoons fresh dill, chopped (or 1 tablespoon dried dill)
- 1 tablespoon lemon juice
- 1 teaspoon garlic powder
- Salt and pepper to taste
🥄 Instructions:
- Step 1: Rinse all vegetables under cold water.
- Step 2: Halve cherry tomatoes.
- Step 3: Slice cucumbers into rounds or half-moons.
- Step 4: Cut bell peppers into strips.
- Step 5: Trim and wash broccoli and cauliflower florets.
- Step 6: Leave baby carrots whole or slice if desired.
- Step 7: In a mixing bowl, combine Greek yogurt, dill, lemon juice, garlic powder, salt, and pepper.
- Step 8: Whisk until well combined and smooth.
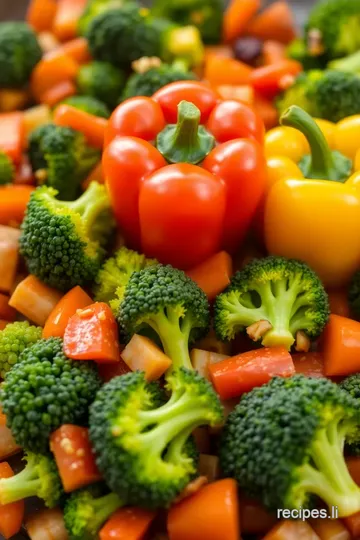
- Step 9: On a large platter, arrange vegetables in groups or a colorful rainbow pattern for visual appeal.
- Step 10: Serve the dip in a small bowl placed at the center or on the side.
Previous Recipe: How to Bake Delightful Cookies with Orange Ricotta: My Easy Recipe!
Next Recipe: How to Make No-Bake Chocolate Cheesecake Delight: My Easy Recipe