Checkers Milkshake Flavors: A Creamy Delight in Every Sip
Ever tasted the bliss of Checkers milkshake flavors? Join me on a creamy adventure with these delightful recipes that'll satisfy your sweet cravings!

Checkers Milkshake Flavors: A Creamy Adventure in a Glass
Have you ever taken a sip of a milkshake and been instantly transported back to summer days spent at your favorite drive-in? i remember hustling on the asphalt parking lot with my cousins, laughing, and trying to one-up each other with who could drink their milkshake the fastest.
That’s the kind of vibe we’re talking about with checkers milkshake flavors . they give you that nostalgia with a creamy twist that makes you smile!
So, what exactly are these checkers milkshake flavors all about? they're a delicious collection inspired by what you’d find at your local checkers drive-in.
Think rich, creamy, and loaded with classic combinations like chocolate, strawberry, and even oreo. whether you whip these up for a hot summer day or just to treat yourself, trust me, they’ll become your go-to easy dessert recipes for any occasion.
Recipe Overview
Let’s take a little walk through history. milkshakes date back to the late 19th century when they were originally a mix of whiskey and eggs! yikes, right? today, milkshakes have evolved into creamy, dreamy concoctions, especially at places like checkers, where they serve up thrilling creamy ice cream shakes .
In today's world, milkshakes are super popular, especially in the summer. kids love them at parties, and let’s be honest, adults do too! plus, making your own is a total game-changer.
You can enjoy a homemade milkshake in just about 10 minutes flat, with no cooking involved. seriously, if you can press a button and pour, you can do this!
And let’s not forget about the wallet. whipping up these milkshake flavors at home is way cheaper than the drive-thru and yields about 4 servings .
So, you can enjoy with friends or stash some away for yourself!
Key Benefits
Now, onto the good stuff—why these checkers milkshake flavors rock! first off, you’re getting some tasty health benefits depending on your ingredients.
Use fresh strawberries in your strawberry milkshake , and boom—antioxidants galore! plus, milk is a great source of calcium and vitamin d.
What’s super cool about these shakes is their customizable nature . want a sweet twist? toss in some peanut butter! feeling fruity? how about a banana? you can play with flavors until the cows come home, making them perfect for any kind of special occasion.
Birthdays? check. bbqs? double check. rainy day blues? you got it!
In a nutshell, these milkshakes allow you to indulge without feeling guilty. they’re perfect for kids' parties and those times when you just need a high-calorie dessert to brighten your day.
Seriously—what’s better than a refreshing cup of your favorite frozen beverages , topped with a mountain of whipped cream?
Get Ready to Blend!
So, are you excited to dive into the wonderful world of checkers milkshake flavors ? trust me, each creamy sip is like a warm hug from your childhood.
Plus, whipping them up is as easy as falling off a log. it’s time to gather the ingredients, grab your trusty blender, and bring all those flavors to life.
Before you know it, you’ll be savoring rich chocolate milkshakes and minty cool mint chocolate chip shakes. Get ready—your sweet, creamy adventure awaits right in your kitchen!
Next up, we’ll dive into the ingredients you’ll need for this milkshake extravaganza. Let’s get blending!
Essential Ingredients Guide
Let’s dive into the ultimate guide for making perfect milkshakes! because honestly, nothing can beat a good ol' milkshake on a hot day, right? this will help you mix up some delectable creations , whether you’re whipping up a checkers milkshake recipe or just some classic creamy ice cream shakes at home.
Premium Core Components
First up, we need to discuss the premium core components that make a killer milkshake. The backbone of any good shake comes down to quality ingredients , and trust me, that matters !
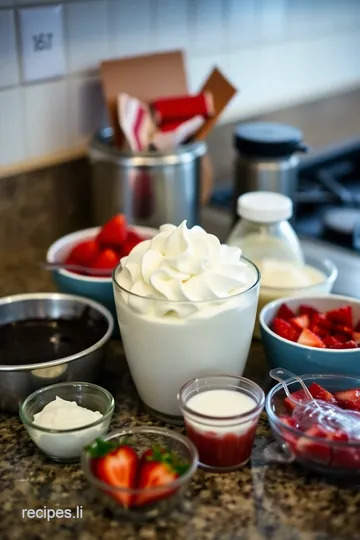
Detailed Measurements: For starters, you’ll need to know what you’re working with. Here’s the scoop:
- 4 cups vanilla ice cream (960 mL)
- 1 cup whole milk (240 mL)
- Optional: 1/4 cup whipped cream for topping (60 mL)
Quality indicators: look for a rich and creamy ice cream that isn't too airy . you want that luscious goodness! fresh milk should have no smell and a nice, unbroken seal if you’re buying from the store.
Storage guidelines and shelf life: ice cream typically lasts about two to three months in the freezer, while milk should be consumed within a week after opening.
Keep that ice cream nice and cold, and don’t let it sit out on the counter!
Freshness Tips: Always check that expiration date and ensure your milkshake ingredients are fresh. You don’t want a funky flavor ruining your nostalgic dessert!
Signature Seasoning Blend
Now let’s get to the fun part— signature seasoning blends ! While milkshakes are naturally sweet, a bit of flair never hurt anyone.
Essential Spice Combinations: Adding a dash of vanilla extract can elevate your shake!
Herb Selections: This part might sound cray, but fresh mint goes great in a mint chocolate chip milkshake . Always a fresh combo!
Regional Variations: You might be like, “What about other flavors?” Good question! Some regions fuss over those pecan pie and chocolate peanut butter milkshake options. Think outside of chocolate, folks!
Smart Substitutions
Sometimes, you find yourself craving a milkshake, but you’re missing key ingredients. Don’t worry; here’s where smart substitutions come into play!
-
Common Alternatives: If you don’t have vanilla ice cream, try making a shake with frozen yogurt or sorbet. Are we making a fruity milkshake? Gosh, how about some frozen bananas?
-
Dietary Modifications: Going dairy-free? Swap out the whole milk for almond or oat milk. It’ll still be delicious!
-
Emergency Replacements: No chocolate syrup? No worries—you can make a quick DIY version with cocoa powder and sugar mixed into milk.
-
Seasonal Options: You can always switch it up with seasonal fruits. Imagine a refreshing strawberry milkshake in summer!
Kitchen Equipment Essentials
Alright, let’s talk kitchen equipment essentials . You don’t need a ton of fancy stuff to whip up a basic milkshake.
-
Must-Have Tools: Grab a blender, measuring cups, and tall glasses for serving. A set of good-quality spoons helps too.
-
Prep Tips: Before blending, chill your glasses in the freezer. Trust me, it makes the milkshake look even more appetizing!
Final Thoughts
So, whether you’re mixing up an oreo milkshake , a decadent chocolate milkshake or a zingy fruit shake, this guide has your back.
Remember, making homemade milkshakes is about having fun and experimenting . now, let’s jump into those rock-solid instructions for crafting your sweet summer beverages.
You’re going to love every sip!
Professional Cooking Method: Crafting Decadent Milkshakes
When you think of making a killer milkshake, like those tempting checkers milkshake flavors , it’s not just about slapping together some ice cream and milk.
No way! you gotta nail down those professional cooking methods to up your game, whether you’re hosting a party or just brushing up on your homemade milkshake skills.
Let's dive in!
Essential Preparation Steps
First, let's chat about mise en place . this fancy term just means having all your ingredients ready and measured. imagine diving into your fridge and rummaging for that chocolate syrup – no fun, right? so grab your 4 cups of vanilla ice cream and 1 cup of whole milk and have them on the counter, ready to go.
Next up, time management . you want to keep it snappy! spend about 10 minutes prepping, so you can whip up those milkshakes fast.
Plan to blitz through your flavors – chocolate, mint chocolate chip, or even an oreo milkshake.
Organization strategies are key. stack your ingredients in the order you're going to use them. line up each flavor so you can move from one milkshake to the next without missing a beat.
And hey, let’s not forget safety considerations. if you’re using a blender, keep fingers away from the blades – they bite!
Step-by-Step Process
Time to roll! Here’s a step-by-step on how to create these milky masterpieces:
-
Prep the Base Milkshake : In your blender, toss in 4 cups of vanilla ice cream and 1 cup of whole milk .
-
Blend It : On high speed (about 30 seconds ), blend until smooth. This will give you that creamy perfection for your base.
-
Add flavors : here’s where the fun begins! for a chocolate milkshake , add 1/2 cup chocolate syrup and blend again for a quick 10 seconds .
Wanna go fruity? toss in 1/2 cup fresh strawberries with some strawberry syrup for a refreshingly sweet treat.
-
Temperature Control : A solid milkshake should feel cold and creamy. If it’s melting too fast, pop it in the freezer for a minute.
-
Visual Cues : You’ll know it’s ready when it’s thick but still pourable. You want it to flow smoothly into your glass—nobody wants a sad, slushy drink!
Expert Techniques
Alright, let’s talk expert techniques for those who dare to dream bigger. the secret to the best milkshakes lies in choosing high-quality ingredients – this means rich, creamy ice cream.
Check your local shop for some of those homemade ice cream flavors ; they can elevate your shakes from basic to absolute dreamy .
Now, here’s a critical step : taste as you go. the balance of flavors is crucial. not sweet enough? a splash more syrup or a scoop of sugar could do the trick.
Use quality checkpoints : does it taste good? is it thick enough? if not, adjust your mix accordingly.
Success Strategies
Need some success strategies ? Here are my top tips:
-
Avoid Common Mistakes : Don’t overshoot the blending time! A few seconds too long can leave you with a soupy mess.
-
Quality Assurance : Use a tall glass to serve. It makes for a nice presentation and keeps the milkshake cold longer.
-
Perfect Results : If you’re prepping for a party, make your base in advance, stash it in the freezer, and add flavors when you're ready to serve.
-
Make-ahead Options : You can mix your base and store it in the freezer up to a few hours ahead. Just remember to blend it again for that perfect shake texture!
Let’s Wrap It Up!
So, there you have it! making milkshakes is as fun as it is delicious. with a bit of planning and these cooking methods, you’ll whip up the best chocolate, strawberry, mint chocolate chip, and oreo milkshakes without a hitch.
These can be your go-to easy dessert recipes , whether you’re treating the kids or yourself on a hot summer day.
And speaking of sweet summer beverages, if you're looking for more creative ideas, stay tuned for our next section, where we dive deeper into additional information on flavors, toppings, and serving suggestions!

Additional Recipe Information: Your Guide to the Perfect Milkshake Adventure
Pro Tips & Secrets
Oh my gosh, let me tell you a little something about making creamy milkshakes. first off, use high-quality ice cream .
Seriously, it makes all the difference! my go-to is always that good stuff—rich and dreamy—if you wanna achieve that silky-smooth texture so coveted in creamy ice cream shakes .
Now, when it comes to flavor enhancement, consider adding a splash of vanilla extract or a pinch of salt. it sounds simple, but it brings out all those delicious notes.
Need a time-saving hack? make your base milkshake in advance! just blend vanilla ice cream and milk, store it in the fridge, and voila! your homemade milkshakes are half ready to go.
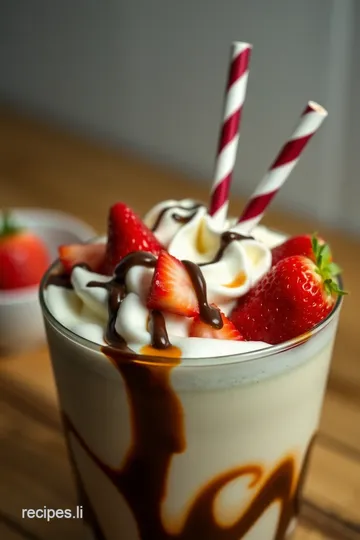
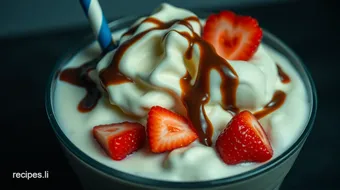
Want to wow your guests? presentation is key! pour your milkshake into chilled glasses. top it with a generous dollop of whipped cream, sprinkle on some colorful toppings, and don’t forget the cherry on top.
Trust me, your friends will think you’re a pro!
Perfect Presentation
Let's talk about how to make those milkshakes look as good as they taste! grab that tall glass and fill it with your milkshake.
Use a large straw or even a spoon for that extra flair. now, think about garnishing. crushed oreos or rainbow sprinkles can never go wrong.
You want those sweet summer beverages to leap off the table in pure visual delight!
When it comes to color combinations, picture this: a chocolate milkshake topped with a swirl of whipped cream and drizzled chocolate syrup.
It’s like having a dessert that’s as pretty as it is tasty.
Storage & Make-Ahead
If you find yourself with leftover milkshake (which is rare, but hey, it could happen), a good trick is to pour it into ice cube trays.
Later, toss those cubes in a blender for a quick treat. for freshness, aim to consume your checkers milkshake flavors within 3 days but let’s be real, they’re best enjoyed right away!
Creative Variations
Feel like mixing things up? try a banana milkshake by adding a ripe banana to your blend. or spice it up with a mint chocolate chip milkshake—just toss in some peppermint extract and chocolate chips.
How about seasonal twists? in summer, throw in fresh peaches, or for fall, think about pumpkin spice. the options really are endless, like a never-ending party in your glass!
Complete Nutrition Guide
Okay, let’s get down to the nitty-gritty. each serving of our checkers milkshake recipe clocks in at about 490 calories.
While it's definitely a high-calorie dessert , it’s a treat you can indulge in from time to time. full of sugar and a bit of fat, yes.
But hey, life’s too short not to enjoy some indulgent desserts !
If you’re watching your diet, consider portioning yourself a half-serving. Or, swap regular ice cream for a low-calorie version or dairy-free ice cream —there are tons of options these days!
Expert FAQ Solutions
You might be wondering, “why won’t my milkshake thicken?” it’s usually a case of too much milk. just cut back a little next time, and you’ll be golden.
Or, if you're looking for a decadent twist, maybe try adding malt powder for that classic diner vibe.
Some folks ask about using fresh fruit. Go for it! Just remember that fresh fruits contain moisture, so you might have to adjust the other ingredients.
Encouraging Conclusion
So there you have it! whether you’re throwing a kids' party or just treating yourself to some rich dessert ideas , making milkshakes at home is super fun and very customizable! don’t hesitate to experiment with those milkshake flavors until you find your perfect blend.
It’s all about having a blast in the kitchen and making memories with family and friends. so grab that blender and start creating your epic milkshake adventure! you’ve got this!
Checkers Milkshake Flavors: A Creamy Delight in Every Sip Card
⚖️ Ingredients:
- 4 cups vanilla ice cream
- 1 cup whole milk
- 1/4 cup whipped cream topping (optional for garnish)
- 1/2 cup chocolate syrup
- 1/2 cup fresh strawberries, hulled and diced
- 2 tablespoons strawberry syrup
- 1/2 teaspoon peppermint extract
- 1/2 cup chocolate chips
- 6 Oreo cookies, crushed
🥄 Instructions:
- Step 1: In a blender, combine the vanilla ice cream and whole milk. Blend until smooth and creamy.
- Step 2: For Chocolate: Add chocolate syrup and blend until well combined.
- Step 3: For Strawberry: Add fresh strawberries and strawberry syrup, then blend.
- Step 4: For Mint Chocolate Chip: Add peppermint extract and chocolate chips, then blend.
- Step 5: For Oreo: Add crushed Oreos and blend until mixed.
- Step 6: Pour the milkshake into tall glasses. Top with whipped cream if desired. Serve immediately with a straw.
Previous Recipe: My Grandmother's Lacomedia Sweet Potato Soufflé: 5 Easy Tips for Success