Baking Cherry Scones
Craving a delightfully soft treat? Discover my easy method for baking cherry scones, with tips to ensure a tender texture and irresistible flavor!

- Essential Ingredients Guide: The Key to Perfecting Your Baking
- Mastering Professional Cooking Methods
- Pro Tips & Secrets for Baking Cherry Scones
- Perfect Presentation of Your Cherry Scones
- Storage & Make-Ahead Tips
- Creative Variations to Spice Things Up
- Complete Nutrition Guide
- Expert FAQ Solutions
- A Sweet Conclusion
- Recipe Card
Let me take you back to a sunny saturday morning. the kind where the light shines in just right through the kitchen window, and you can hear the faint sounds of birds chatting outside.
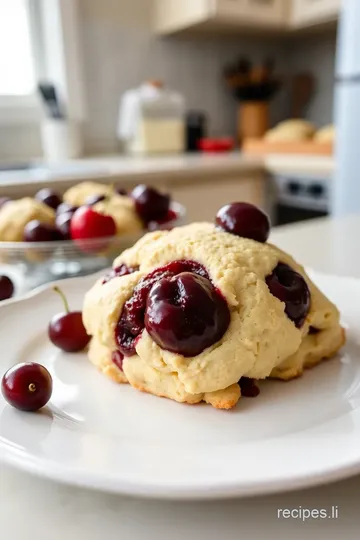
One of those mornings, i decided to try my hand at baking cherry scones - delightfully soft treats . honestly, i had never attempted scones before, but there was just something about the thought of warm, flaky pastries filled with fresh cherries that inspired me.
Have you ever been hit with that strange craving that won’t leave you alone? yeah, that was me!
As i gathered the ingredients—flour, sugar, fresh cherries—i couldn’t help but think about the history of these little beauties. scones have a rich background, tracing back to britain where they became a staple during afternoon tea.
Even today, when you whip them up in your own kitchen, they’re not just a treat; they’re a connection to tradition, a moment you can share with family and friends, or just a cozy breakfast for yourself.
Recipe Overview
So, let’s get to the good stuff about our cherry scones! this cherry scone recipe is not all that complicated.
Sure, it takes a pinch of care and attention, but i promise the effort is worth it. we’re talking about roughly one hour and five minutes from start to finish .
It’s a medium-difficulty recipe, mainly because you really want to avoid overmixing the dough. that’s the key to achieving those soft scones you dream about!
Now, what about the cost? i won’t lie; it’s not super expensive to whip up homemade scones . most of the ingredients are things you probably already have lying around.
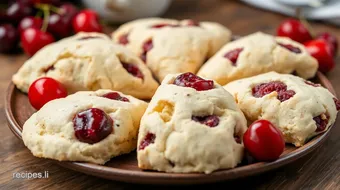
Cherries can vary in price depending on the season, but they’ll give you a good yield—about eight fluffy scones to share (or not!).
Key Benefits
Not only are these scones delicious, but they offer a few health perks too. you get to enjoy the natural sweetness of cherries, which are packed with antioxidants.
Plus, if you use whole milk, you're benefiting from some nice calcium to start your day. think about it: healthy breakfast ideas don’t have to be boring!
What’s unique about this recipe? Well, you can use these soft scones for all sorts of special occasions—brunch with friends, a quirky afternoon tea, or even just because it’s Tuesday! They’re kinda like a hug in pastry form, you know?
Sure, there are tons of sweet scone toppings and variations you can explore, like adding chocolate chips or switching out cherries for seasonal fruits.
But these cherry scones stand out because they’re truly delightful when you get that perfect combination of buttery goodness and fruity pops of flavor.
As we dive into this cherry dessert idea, I can practically taste that buttery richness melting in my mouth. Drop a little clotted cream on top, pair it with your favorite tea, and prepare for the compliments to roll in!
And before we jump to the ingredient list, remember to keep those cherry baked goods on your radar. Once you get the hang of this easy scone recipe, you’ll discover a whole new world of baking adventures awaiting you!
So grab your apron, and let’s get set to bake something truly special that’ll make your mornings brighter!
Essential Ingredients Guide: The Key to Perfecting Your Baking
When it comes to baking, especially for delicious treats like baking cherry scones - delightfully soft treats , every ingredient counts.
I mean, come on, who wants a dry scone, right? whether you’re a newbie or a seasoned pro in the kitchen, knowing your ingredients can elevate your baking game.
So let's jump in and break it down!
Premium Core Components
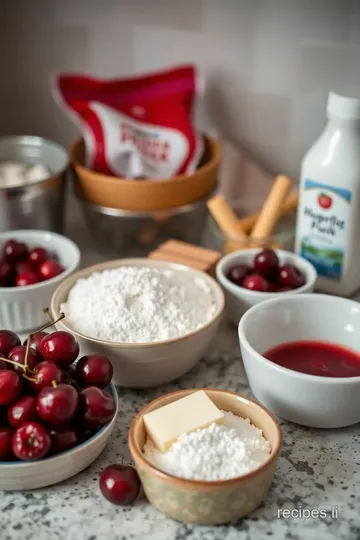
Measurements matter! for our cherry scones, you'll need 2 cups (250g) all-purpose flour , which is a great start. if you’re looking for accuracy, a digital kitchen scale is your best friend.
Trust me, it'll make your baking life so much easier!
What about quality? always look for fresh cherries when making cherry baked goods. you want them vibrant, deep red, and firm.
They should smell sweet and delightful – that's how you know they're good!
Now, let’s chat storage for your ingredients. flour can be stored in a cool, dark place for up to six months .
For those fresh cherries? use them as soon as possible; they’ll last about 3-5 days in the fridge. a tip? freeze any extras – they can be a game changer for future scone adventures!
Signature Seasoning Blend
Spice it up! while our cherry scones are sweet and fruity, a sprinkle of salt elevates those flavors beautifully. pair your cherries with a hint of vanilla extract – that's a must to create a warm and inviting aroma.
Thinking about herbs? for more of a twist, try adding lavender or even orange zest . it may sound fancy, but they bring out a whole new world of flavors.
And hey, if you're feeling adventurous, mix it up! experimenting with regional variations is part of the fun.
Smart Substitutions
Sometimes you just need to improvise. no milk? no problem! swap it out with almond milk for a dairy-free treat.
Here's the kicker: if you find yourself out of flour, almond flour can work too. just use a bit less, as it’s more dense!
Have dietary restrictions? You can easily make gluten-free scones by going for a gluten-free 1:1 baking blend. It’s that easy, and trust me, they’ll still taste 100% amazing!
Kitchen Equipment Essentials
You don’t need a ton of fancy gadgets for baking delicious cherry scones. a simple mixing bowl and a whisk will do wonders.
Want to cut your butter? a pastry cutter is super helpful, but two forks work just as well!
An important tip? have parchment paper on hand. it helps those flaky scones not to stick. and let’s not forget the biscuit cutter or a sharp knife for that perfect round shape.
Keeping things simple makes baking less stressful, y’know?
Speaking of stress, let’s talk about chilling the dough . this may seem like an extra step, but it’s all about achieving that soft, flaky texture .
Pop it in the fridge for about 30 minutes while you preheat the oven. you’ll thank yourself later!
Final Thoughts: Ready to Bake?
Now that you’ve got the lowdown on essential ingredients and kitchen tools, it's time to put all this knowledge into action.
The delightful aromas of fresh cherry scones will soon fill your kitchen. and trust me, once you experience the joy of baking cherry scones - delightfully soft treats , you’ll want to share them at brunches or tear into them during a cozy afternoon tea.
So, grab your ingredients and equipment, and let’s dive into the detailed instructions on how to whip up these delightful scones. Let’s get baking!
Mastering Professional Cooking Methods
So, you're ready to level up your cooking game? perfect! when it comes to baking, especially something as classic as baking cherry scones - delightfully soft treats , getting the basics down can make all the difference.
Let’s break down the professional cooking methods that will have you whipping up those soft scones in no time!
Essential Preparation Steps
Mise en place is your best friend, folks. it’s just a fancy way of saying, “get your stuff together.” before you even think about turning on the oven, have all your ingredients measured and ready.
Trust me, it saves you from scrambling mid-recipe when you suddenly find yourself short an egg or missing a cup of flour.
Now, let’s chat time management. this recipe takes about 1 hour and 5 minutes from start to finish, including 30 minutes of chilling.
While you're waiting, tidy up your workspace. this not only keeps you organized but also gives you peace of mind while you're baking.
Speaking of organization, don’t forget safety! Keep your area clutter-free. Always use sharp knives carefully and be cautious with hot surfaces. Safety first, people!
Step-by-Step Process
Let’s get into the nitty-gritty! Here’s a quick rundown to nail that cherry scone recipe:
- Preheat your oven to 400° F ( 200° C) . No one wants to mess with an undercooked scone!
- Mix dry ingredients like flour and sugar in a large bowl. Then, cut in that chilled butter until it looks like coarse crumbs. Seriously, this is the secret to flaky scones.
- Combine wet ingredients – a splash of milk and an egg will make your scones super moist. Don’t overmix, though! We want soft scones, not lead weights.
- Fold in fresh cherries gently. They should be evenly dispersed without squishing them too much.
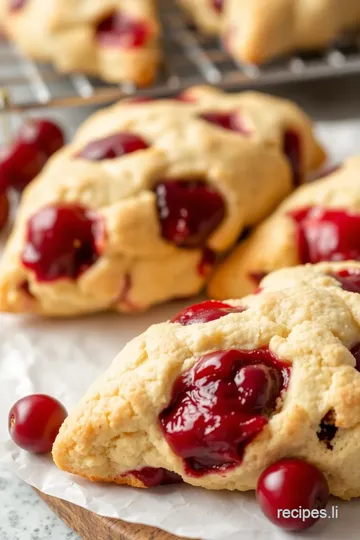
- Shape your dough into a circle about 1 inch thick , cut into triangles (or use a cookie cutter for rounds). Oh, it’s starting to look delish!
- Chill your dough for those 30 minutes if you’ve got the patience. It helps with texture, trust me.
- Finally, bake for 15- 20 minutes until golden. Look for that slight browning along the edges.
Expert Techniques
Now, let’s talk about some expert baking techniques! first, keep that butter super cold . it’s what helps create those flaky layers.
Also, if you’re ever in between using fresh vs. frozen cherries, i suggest keeping them frozen. throwing in frozen cherries prevents the dough from getting soggy!
When you pull those cherry scones out of the oven, let them cool a bit. look into in while they’re still warm – trust me, the aroma is killer.
Success Strategies
But hey, let’s chat about success strategies. common pitfalls include overmixing the dough or not measuring your flour precisely. take the time to measure, even if you're in a rush.
This will prevent dense, sad scones. and if you’re prepping ahead? these scones are freezer-friendly! just wrap them tight and they can hang out in the freezer for those “i need a scone instantly” days.
For top-notch quality, always taste as you go. Adjust sugar or add a bit of almond extract if you’re feeling daring. Who doesn’t love a fun twist on traditional tea time treats?
Wrapping It Up
Baking cherry scones - delightfully soft treats isn’t just about the recipe; it’s about the experience! remember, baking is an art and a science.
Keep learning those scone baking tips and tricks for the best cherry scones possible. experiments lead to perfecting your own style, and you’ll be serving up brunch recipes with scones that friends rave about in no time.
Feeling inspired? Let’s dive into some Additional Information . Here, you can find more tips, variations, and maybe even tackle some fun cherry dessert ideas!
Pro Tips & Secrets for Baking Cherry Scones
So, you're diving into baking cherry scones - delightfully soft treats , huh? awesome! let me share some of my go-to tips that i've learned along my baking journey.
They make a world of difference, trust me!
First off, using cold ingredients is non-negotiable. you want that buttery flavor to shine through in your soft scones . flecks of cold butter in the dough lead to those lovely, flaky layers that make you go, “oh my gosh, yes!”—essential for any quick scone recipe.
And remember, don’t overmix! just mix until everything is combined. if you overdo it, you risk ending up with dense scones, and nobody wants that.
Now, let’s talk about chilling the dough . i know, it feels like a pain sometimes, but it helps develop flavor and keeps your scones light and airy.
So just pop that dough in the fridge for about 30 minutes. it’s a game-changer!
And don’t skip that egg wash before baking! it gives your scones a gorgeous, golden color that’ll have everyone wondering if you studied at a fancy culinary school.
Trust me; you’ll want to show off those gorgeous cherry baked goods.
Perfect Presentation of Your Cherry Scones
You’ve done all this hard work, and now it’s time to make those scones look as good as they taste.
Plating is key! a simple white plate can really make your scones pop, especially if you serve them with fresh cherry desserts or a bit of clotted cream on the side.
It's all about contrast!
You can also sprinkle a little powdered sugar on top right before serving for that “instagrammable” touch. how about adding fresh mint leaves or a few extra cherry halves for garnish? not only does it add color, but it also brings that fresh vibe to your brunch recipes.
Storage & Make-Ahead Tips
Alright, so after making those best cherry scones , you might be wondering about storage. if you have leftovers (which you might not because they are that good), put them in an airtight container.
They’ll stay fresh for about 2 days at room temperature. if you want to keep them longer, pop them in the fridge, and they'll last about a week.
Now, if you’re thinking about meal prepping, you can totally make the dough ahead of time! wrap it tightly and store it in the fridge for up to 3 days or freeze it for about a month.
Just remember: baking time for scones might vary depending on how cold the dough is when you bake it, so adjust your times a bit!
Creative Variations to Spice Things Up
Ever feel like switching it up? you can easily adapt this easy scone recipe to fit the season! swap out cherries for raspberries or blueberries for a different twist.
Or why not experiment with flavors? a touch of lemon zest can brighten things up!
For all my health-conscious friends, you can use gluten-free flour or dairy-free options —almond milk works perfectly! are you looking for scone variations ? add chocolate chips or nuts to change the flavor profile completely.
This recipe is a canvas; let your creativity shine!
Complete Nutrition Guide
Now, let's break down the nutritional information for baked goods . one scone has about 210 calories, which isn’t too shabby for how delightful they are.
You get a little protein, but hey, it’s a breakfast pastry, not a protein bar!
And if you’re looking for healthier alternatives, consider swapping out some sugar with honey or using whole grain flour. these subtle changes still hold onto that tasty scone goodness while lending a little healthy twist.
Expert FAQ Solutions
Got questions? i’ve been there! one major question is, "why are my scones dense?" overmixing is oftentimes the culprit. another common concern is about the ideal baking techniques for scones .
Always preheat your oven—this will give you that golden crust and soft center.
If you’re using frozen cherries, remember to mix them in directly from the freezer. Don’t let them thaw, or else you’ll end up with soggy scones. Yuck!
A Sweet Conclusion
Baking cherry scones - delightfully soft treats is not just about satisfying your sweet tooth. it’s about creating memories, whether you're sharing a plate at brunch or whipping up a batch for a cozy afternoon.
So go ahead, get in that kitchen, and whip up some magic! trust me, once you take that first bite, you’ll be hooked.
Happy baking, friends!
Baking Cherry Scones Card
⚖️ Ingredients:
- 2 cups (250 g) all-purpose flour
- 1/2 cup (100 g) granulated sugar
- 1 tablespoon baking powder
- 1/2 teaspoon salt
- 1/2 cup (115 g) unsalted butter, chilled and cubed
- 1/2 cup (120 ml) whole milk
- 1 large egg
- 1 teaspoon vanilla extract
- 1 cup (150 g) fresh or frozen cherries, pitted and halved
- 1 egg, for egg wash
- Additional sugar for sprinkling
🥄 Instructions:
- Step 1: Preheat your oven to 400°F (200°C) and line a baking sheet with parchment paper.
- Step 2: In a large bowl, whisk together flour, sugar, baking powder, and salt.
- Step 3: Add chilled, cubed butter and use a pastry cutter or forks to mix until the mixture resembles coarse crumbs.
- Step 4: In another bowl, whisk together milk, egg, and vanilla extract.
- Step 5: Pour the wet mixture into the dry ingredients and gently mix until just combined. Fold in cherries carefully.
- Step 6: Turn dough onto a floured surface; pat into a circle about 1 inch thick. Cut into triangles or use a biscuit cutter for rounds.
- Step 7: Chill for 30 minutes to enhance texture.
- Step 8: Brush scones with egg wash and sprinkle with sugar, if desired.
- Step 9: Place on the prepared baking sheet and bake for 15-20 minutes or until golden.
- Step 10: Allow to cool slightly before serving. Enjoy warm or at room temperature.
Previous Recipe: How to Make Herb-Crusted Roasted Venison Haunch with Rich Flavors
Next Recipe: Easy Bake Chicken with Crispy Cheesy Goodness: A Family Favorite