Delightful Classic Chocolate Layer Cake
Ever wondered how to make the ultimate chocolate layer cake? Join me as I share my family's favorite recipe to bake classic chocolate layer cake delightfully—it's rich, moist, and so easy!

- Let’s look into into Chocolate Indulgence
- What Makes This Cake Special?
- Health Benefits and More
- Let’s Gather Our Ingredients!
- Essential Ingredients Guide for Your Baking Dreams
- Professional Cooking Method: Mastering Your Chocolate Layer Cake
- Bake Classic Chocolate Layer Cake Delightfully: Delectable Insights
- Recipe Card
Let’s look into into Chocolate Indulgence
Have you ever taken a bite of a chocolate cake that made you feel like you were floating on a cloud of cocoa bliss? same here! i remember baking my very first chocolate layer cake for my brother’s birthday.
I was nervous, of course, standing in my tiny kitchen, surrounded by flour and excitement. it felt like the ultimate love letter to chocolate.
And let me tell you, that first experience of bake classic chocolate layer cake delightfully is something i'll never forget!
Chocolate layer cakes have been a staple in kitchens across america since before we had fancy shops and bakeries to turn to.
From grandma’s kitchen to celebrity food blogs today, they have a way of bringing joy to any gathering. honestly, who can resist a slice of moist chocolate cake topped with rich chocolate buttercream frosting ? it’s like a hug wrapped in chocolate!
What Makes This Cake Special?
So, here’s the scoop. chocolate layer cakes are not some high-flying dessert, yet they bring serious wow-factor. they hail from old-school roots that stretch back generations.
Originally, layer cakes were elaborate celebration cakes meant for big occasions. today? they are as popular as ever, whether for birthdays or just because it’s tuesday.
This classic recipe is pretty straightforward—perfect for newbies and seasoned bakers alike. it requires about 1 hour and 20 minutes from start to finish, including 30- 35 minutes of baking time .
With a prep time of just 30 minutes , you’re well on your way to chocolate heaven before you know it.
Plus, it serves between 10 to 12 people, so there’s plenty to share—or not!
Now, let’s talk about the cost. baking your own cake often beats spending way too much in a bakery. the ingredients are simple, and you probably have most of them hanging out in the pantry.
Think of this cake as a sweet indulgence that won’t break the bank!
Health Benefits and More
Alright, before you roll your eyes thinking this is just a calorie bomb, hear me out. chocolate cake offers more than just sweetness.
When made with quality cocoa, it contains antioxidants. plus, if you swap in some sugar alternatives or gluten-free baking options, you can still enjoy that rich flavor without the guilt.
It's all about balance, right?
Let’s not forget : this cake is fantastic for all sorts of occasions! whether you’re celebrating a birthday or just wanting to impress your friends at a dinner party, it’s a versatile option.
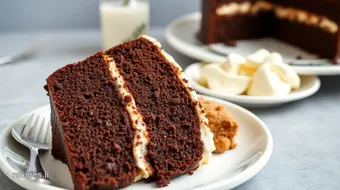
Picture this: a gorgeous homemade layer cake , elegantly decorated with a sprinkle of joy (and sprinkles!) that truly feels gourmet.
And let me tell you, the assembly of this cake is part of the artistry. layering that chocolate buttercream frosting between each moist layer? pure magic.
It's what makes this cake stand out from other recipes in the chocolate cake universe. not to mention, it’s a guaranteed hit when paired with whipped cream toppings or fresh fruit.
I can practically taste it now!
Let’s Gather Our Ingredients!
Whew! i’m practically salivating as i write this. but before we start mixing, we need to prep those baking pans and round up our ingredients.
Trust me, the result will be a show-stopping dessert that brings everyone together. stick around, and we’ll jump into gathering what we need to make this chocolate masterpiece happen!
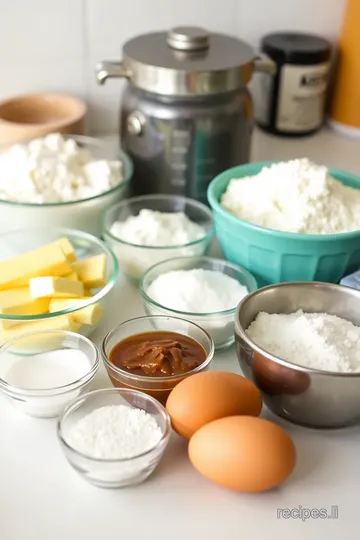
Essential Ingredients Guide for Your Baking Dreams
Hey there, fellow chocolate lovers! so, you’re ready to dive into the world of baking? awesome! whether you're prepping for a birthday bash or just want to bake classic chocolate layer cake delightfully , having a handle on your essential ingredients is key.
Let’s break it down into bite-sized pieces!
Premium Core Components
Alright, first things first! When it comes to crafting that moist chocolate cake , you gotta have the right ingredients. Here’s a quick hit list for you to keep in mind:
- All-Purpose Flour : You’ll need about 1 ¾ cups (220g) . This forms the cake’s structure.
- Unsweetened Cocoa Powder : Grab ¾ cup (65g) for that rich chocolate flavor. Avoid the sweetened stuff here.
- Baking Powder and Baking Soda : Both are essential. Use 1 ½ tsp of each for maximum lift.
- Salt : Just ½ tsp to balance the sweetness.
Quality Indicators
Look for flour that feels fine and powdery. Opt for cocoa that’s dark, rich in color, and not too dusty. And check the expiration date—old ingredients lead to lackluster results.
Storage Guidelines
If you store opened flour and cocoa in airtight containers, they can last up to 6-12 months . Keep ‘em in a cool, dry place for the best shelf life.
Signature Seasoning Blend
Next up is our friend, flavor! herbs and spices can really amp up that chocolate dessert game. while traditional chocolate cake is rich on its own, adding a hint of espresso powder can take it to another level.
Just a teaspoon of that will enhance the chocolate without stealing the spotlight.
Essential Spice Combinations
Think about combining a bit of cinnamon with chocolate for a warm flavor—especially nice in colder months!
Regional Variations
In some southern recipes, you might find buttermilk making a guest appearance. it gives a nice tang, enriching that classic layer cake feel.
And if you’re feeling adventurous, experimenting with flavored extracts (like peppermint or orange) can unlock new chocolate cake variations!
Smart Substitutions
Now, let’s chat about substitutions. Life happens, and sometimes you just gotta improvise!
- Common Alternatives : No baking powder? You can use soda and vinegar combo instead (1 tsp baking soda + 1 tablespoon vinegar).
- Dietary Modifications : Got gluten issues? Swap flour for a 1:1 gluten-free mix.
- Emergency Replacements : No buttermilk? Mix 1 cup of milk with 1 tablespoon of vinegar and let it sit for 5 minutes.
Kitchen Equipment Essentials
Let’s not forget the tools of the trade! Here are the must-haves to make your baking experience smoother:
- Mixing Bowls : A few sizes are essential so you can keep things neat while mixing.
- Electric Mixer : A game changer for whipping that chocolate buttercream frosting to perfection.
- Pans : Get yourself two 9-inch round cake pans —they’ll be your best friends for layer cakes!
Preparation Tips
Before you start, remember to preheat your oven to 350° F ( 175° C) and prepare your pans by greasing and flouring them. A little preparation goes a long way!
Wrapping It Up
So there you have it! my guide to essential ingredients for your baking escapades. once you’ve got your ingredients ready and your tools in hand, you’ll be well on your way to creating the best chocolate cake that’ll leave everyone asking for seconds.
Next up, let’s roll into those step-by-step instructions to bring your delightful classic chocolate layer cake to life! You're going to love this. Happy baking!
Professional Cooking Method: Mastering Your Chocolate Layer Cake
Baking a delightful classic chocolate layer cake is kind of like throwing a big party: there’s excitement, some preparation, and ultimately, it’s all about delighting your guests.
But before we dive into that rich chocolate goodness, let’s get our ducks in a row.
Essential Preparation Steps
First up, mise en place . this fancy french term just means “everything in its place.” gather all your ingredients and measure them out before you start.
Trust me, nothing kills your baking vibe faster than digging through the pantry mid-mixing because you forgot the cocoa powder!
Now, let’s chat time management. you’ve got a total of about 1 hour and 20 minutes from start to finish, so plan it out.
Start with your prep—set aside 30 minutes for prepping the ingredients and 15 minutes for assembly. that gives you 30- 35 minutes to bake, during which time your kitchen will smell like heaven.
Organization is key, people! lay out your tools, and keep your workspace tidy. it’s way easier to whip up your moist chocolate cake when you’re not tripping over flour bags.
And let’s not forget safety—hot surfaces and boiling water mean you need to be careful. don’t be that person who grabs a hot pan without an oven mitt.
Step-by-Step Process
Ready to get baking? Follow these steps like you're following a recipe from a fairy tale:
-
Preheat & Prepare. Preheat the oven to a sizzling 350° F ( 175° C) and grease those 9-inch round cake pans . Butter it up nicely!
-
Mix Dry Ingredients. In a big ol' bowl, whisk together 1 ¾ cups of flour, ¾ cup of cocoa powder, baking soda, baking powder, and salt.
-
Combine Wet Ingredients. In another bowl, mix the sugar, milk, oil, eggs, and vanilla until combined. It should look all creamy and delicious.
-
Combine & Stir. Gradually add the dry mix to the wet mix, just until combined. You want to keep it light and fluffy—no one wants a dense cake!
-
Add Boiling Water. Carefully stir in 1 cup of boiling water. Don’t burn yourself! The batter is going to be pretty runny, but that’s what you want.
-
Pour & Bake. Divide the batter and pour it into the prepared pans. Bake for 30- 35 minutes or until a toothpick comes out clean.
-
Cool it down. let your cakes cool in the pans for 10 minutes before transferring them to a cooling rack.
Seriously, let them cool. frosting a hot cake is like trying to paint a wet canvas—messy!
-
Frosting Time. Whip up your chocolate buttercream frosting by beating together softened butter, powdered sugar, cocoa, heavy cream, and vanilla until fluffy.
-
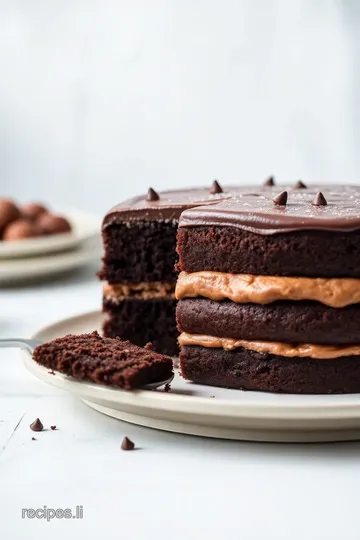
Assemble. Level the cakes, frost the top of one layer, add the second layer, and frost that beauty all over.
-
Decorate & Serve. Fancy it up with chocolate shavings or sprinkles for a pop of color. Then slice it up and watch the smiles appear!
Expert Techniques
Now, for some pro tips that people often overlook. don’t overmix . keep your batter light; overmixing results in dense, chewy cakes—not what we’re going for.
And boiling water? it doesn’t just singe the brow of your cake; it intensifies the chocolate flavor . and hey, if your frosting is too soft, chill it for a bit.
Nobody wants a frosting slide-off!
Success Strategies
Avoid the newbie mistakes. one common pitfall is forgetting to let your eggs and milk hit room temperature . click that ingredient list again and bring ’em out ahead of time! trust me, it makes a difference to your cake texture improvement .
Let’s not overlook the sugar alternatives in baking . Trying to cut sugar? Go for some natural sweeteners that maintain moisture without losing that sweet magic.
Final Thoughts
When you’re looking to bake classic chocolate layer cake delightfully , think of your layers like little slices of joy.
You can tweak this recipe a ton, too! want to make it gluten-free? swap out the flour. feeling frisky? toss in some fresh strawberries between your layers.
So grab those ingredients, hit the oven, and let’s whip up something unforgettable! now that you’re all set, let’s move on to some additional information to make your baking journey even sweeter.
Happy baking!
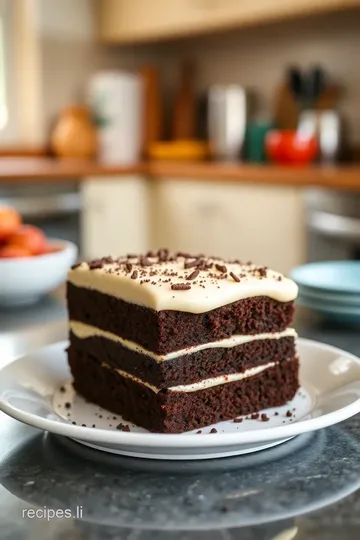
Bake Classic Chocolate Layer Cake Delightfully: Delectable Insights
When it comes to celebrations, nothing beats a classic layer cake . picture this: rich chocolate cake, moist and tender, layered with creamy chocolate buttercream frosting .
That’s what we’re talking about with this recipe. trust me, it’s bound to make any occasion extra special.
Pro Tips & Secrets
Oh my gosh, if there’s one thing i’ve learned over the years, it’s that little secrets can make a big difference.
Here are some of my cherished cake baking tips to elevate your moist chocolate cake game:
- Use Room Temperature Ingredients : This little trick helps your batter become lighter and fluffier. So, pull those eggs and butter out first!
- Watch the Mixing : Don’t overmix! Just combine your ingredients until they’re friends—this keeps the cake tender.
- Boiling Water Magic : Seriously, adding boiling water brings out the chocolate flavor. It’s like a flavor party that your chocolate cake will thank you for!
- Presentation Matters : Level those cake layers for a beautiful stacking. Those uneven tops can ruin the aesthetic, am I right?
Perfect Presentation
Okay, let’s talk about making this cake pretty because we eat with our eyes first. Here's how to make your homemade layer cake a showstopper:
- Plating Techniques : Use a large, flat serving platter. It creates a dramatic backdrop. Place your bottom layer right in the center for an even look.
- Garnish Ideas : Sprigs of mint or a sprinkle of cocoa powder can add a pop of color and extra elegance.
- Color Combinations : Contrast is key! Pair your rich chocolate layers with a light whipped cream topping or fresh berries to brighten things up.
- Visual Appeal Tips : Keep those cake sides smooth! You can use an offset spatula for clean frosting.
Storage & Make-Ahead
Let’s face it, baking can be a time crunch. Here’s how to store your cake and make it ahead of time:
- Storage Guidelines : Store your cake in an airtight container at room temperature for about 2-3 days. If it lasts that long, which is unlikely!
- Reheating Instructions : If you do have leftovers, just pop them in the microwave for about 10 seconds to refresh the cake before serving.
- Freshness Duration : Ideally, enjoy your rich chocolate dessert within a week to keep it at its best.
Creative Variations
You don’t have to stick to the classic! Get wild and introduce some creative variations:
- Flavor Adaptations : Swap out the chocolate for some fresh seasonal flavors. Imagine a chocolate-orange cake—yum!
- Dietary Modifications : Going gluten-free? No worries! A gluten-free flour substitute can work wonders here.
- Seasonal Twists : For fall, add some spice. Think of caramel or apple filling between the layers for a festive touch.
- Regional Variations : Ever tried a German chocolate cake? Incorporating coconut or pecans adds a unique spin to the classic.
Complete Nutrition Guide
It’s always good to know what you’re putting in your body, right? Here’s a breakdown:
- Calories : About 450 per slice, which is just the right indulgence.
- Health Benefits : Dark chocolate offers some antioxidants. So, you can say you're living healthily!
- Portion Guidance : The recipe yields between 10-12 perfect servings; however, don’t be surprised if it disappears faster than you can say “sweet indulgences.”
Expert FAQ Solutions
Got questions? I’ve been there too! Here are some quick solutions:
- Common Questions : Can I use baking cocoa varieties? Absolutely! Just be mindful that some cocoa can be more bitter than others.
- Success Tips : If your cake sinks in the middle, overmixing or an unreliable oven temperature might be to blame.
- Variations Explained : Want to make a gourmet chocolate cake ? Try infusing the batter with espresso for a rich depth.
At the end of the day, remember that baking is all about the fun and the joy of sharing. so, gather your friends, start whisking away, and bake classic chocolate layer cake delightfully .
You got this! whether it's for a birthday, a casual get-together or just because, this cake is bound to impress.
Happy baking, you future cake superstar!
Delightful Classic Chocolate Layer Cake Card
⚖️ Ingredients:
- 1 ¾ cups (220g) all-purpose flour
- ¾ cup (65g) unsweetened cocoa powder
- 1 ½ tsp baking powder
- 1 ½ tsp baking soda
- ½ tsp salt
- 2 cups (400g) granulated sugar
- 1 cup (240ml) whole milk
- ½ cup (120ml) vegetable oil
- 2 large eggs
- 2 tsp pure vanilla extract
- 1 cup (240ml) boiling water
- 1 cup (227g) unsalted butter, softened
- 3 ½ cups (440g) powdered sugar
- ½ cup (50g) unsweetened cocoa powder
- ½ cup (120ml) heavy cream
- 2 tsp pure vanilla extract
🥄 Instructions:
- Step 1: Preheat the oven to 350°F (175°C). Grease and flour the cake pans.
- Step 2: In a large bowl, whisk together flour, cocoa powder, baking powder, baking soda, and salt.
- Step 3: In another bowl, whisk sugar, milk, oil, eggs, and vanilla until well combined.
- Step 4: Gradually add the dry mixture to the wet mixture, mixing until just combined.
- Step 5: Carefully stir in boiling water until the batter is smooth (it will be thin).
- Step 6: Divide the batter between prepared pans. Bake for 30-35 minutes or until a toothpick comes out clean.
- Step 7: Allow cakes to cool in pans for 10 minutes, then transfer to a cooling rack to cool completely.
- Step 8: In a mixing bowl, beat butter until creamy, then gradually add powdered sugar and cocoa, followed by heavy cream and vanilla, beating until fluffy.
- Step 9: Level the cakes if necessary. Place one layer on a serving plate, spread frosting on top, add the second layer, and frost the top and sides.
- Step 10: Optionally, decorate with chocolate shavings or sprinkles, then slice and serve.
Previous Recipe: Easy Grilled Chicken with Spicy Red Peppers | Yum! 5 Delicious Secrets
Next Recipe: Bake Nutty Whole Wheat Artisan Bread Today: My Grandmother's Secret Recipe!